
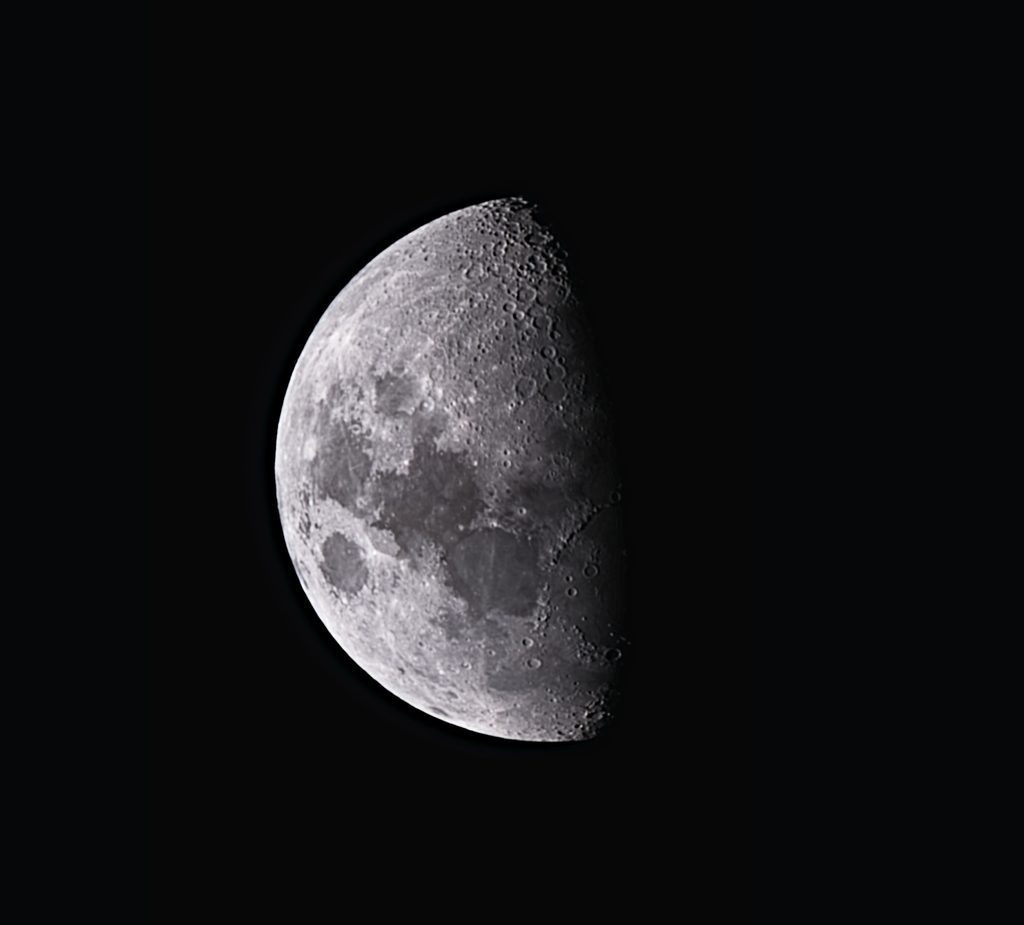
When I first purchased my SeeStar S30 Pro, I was primarily interested in deep sky objects — galaxies, nebulae and star clusters. It wasn’t until I pointed it at the Moon one evening that I realised just how capable this little telescope was for lunar imaging. The detail visible even in a single frame was impressive, but it didn’t take long before I started wondering whether I could push the results further.
That curiosity led me to video stacking — a technique where instead of taking a single photograph, you record a short video of the Moon and extract the best frames from it. The Earth’s atmosphere is never truly still, and even on a clear night, turbulence causes the image to constantly shift and blur. By capturing hundreds of frames in a short burst, you catch brief moments of atmospheric stillness that a single exposure would simply miss. Stack those sharp frames together and you end up with a final image that is cleaner, sharper and more detailed than anything a single shot could produce.
The workflow below is what I finally arrived at after watching multiple instructional YouTube videos and wresting back and forth with Google and Claude Ai to optimise the process. The intention is to get the best possible result from the SeeStar S30 Pro’s 30mm aperture by taking a raw video and processing it though a chain of specialist tools to arrive at a final image.
Capture, Stacking & Sharpening
The goal here is to go from raw video footage to a single, noise-free, well-aligned stacked image. Each tool in the chain handles one specific job, and the output of each feeds directly into the next.
Capture approximately 90 seconds of video with the SeeStar S30 Pro
PIPP
(Planetary Imaging PreProcessing) acts as the initial quality-control and standardization engine in a planetary or lunar astrophotography workflow. It takes raw video files or image sequences (such as MP4, MOV, or SER files), crops and locks the target directly in the center of every frame, discards blurry frames ruined by atmospheric seeing, and exports a quality-sorted, uncompressed file sequence ready for stacking in software like AutoStakkert! or Siril.
Once I’ve captured my RAW (AVI) file from the SeeStar S30 Pro, I load it into PIPP. It’s also possible to take multiple video files (around 90 seconds in duration) and load them as a set which can be joined to produce larger AVI file (the sum of the component video files).
Typical settings are captured in the photo gallery of screenshots below
- Under the Source Files tab, (a) check to see that the file (or multiple files have been loaded). In the case of multiple files, you can select “Join Mode” to create a single video file (b) Select “Solar Lunar Disk Full”
- Input options: (a) untick Debayer Raw image files and (b) “Debayer Monochrome frames” – Bilenear (RGGB)
- Processing Options: (a) tick “Flip vertically” and (b) Enable cropping if required
- Output Options: select Output Format to SER
- Do Processing: click on Start Processing
Note while setting options, click on the Test Options button to check for issues while making changes


Once all the settings are in place, click on “Start Processing”. Depending on the size of the video file the PIPP processing shouldn’t take more than a minute
Once PIPP completes processing and exports the .ser file, the sequence is loaded into AutoStakkert! 4 for frame quality grading, multi-point alignment, and stacking.
AutoStakkert! 4
AutoStakkert! 4 (AS!4) is a free application developed by Emil Kraaikamp, and is one of the most widely used tools for stacking planetary, lunar, and solar images. It is available for Windows and can be downloaded from www.autostakkert.com.
The core idea behind stacking is straightforward: when filming the Moon through a telescope, atmospheric turbulence causes the image to constantly blur and distort. By capturing a long video — typically thousands of frames — you end up with a mixture of sharp and blurry frames. AS!4 analyses every frame, ranks them by sharpness, and then aligns and combines only the best ones. The result is a single master image with significantly better detail and a much higher signal-to-noise ratio than any individual frame could provide.
The workflow follows three steps: Open, Analyse, and Stack.
1) Open
Click the Open button and load your video file. AS!4 supports .ser files (the preferred format for planetary imaging) as well as common video formats such as .avi.
Before moving to the next step, configure the following settings on the left panel:
- Stabilisation mode: For lunar imaging always select Surface. This tells AS!4 to track the texture of the lunar surface rather than a single bright point, which is how it would track a planet. Using the wrong mode here will produce a blurry stack.
- Noise Robust: Set this to 2 for typical high-quality lunar video. Higher values can help with very noisy data but may reduce sharpness.
2) Analyse
Click 2) Analyse to begin frame analysis. AS!4 will scan every frame in the video and assign each one a quality score based on sharpness and atmospheric conditions. This may take a minute or two depending on the size of your video file.
Once analysis is complete, you will see a quality graph appear. The x-axis represents each frame in the video and the y-axis shows its quality score. Ideally you want to see a graph with clear peaks and troughs — this indicates good variation in atmospheric seeing, meaning the best frames are noticeably sharper than the worst ones.
Next, place the Alignment Point (AP) grid:

- Click Place AP grid to automatically distribute alignment points across the image. Aim for around 150 APs for a full lunar disc.
- Alignment points work by tracking small patches of lunar detail independently. This corrects for the fact that atmospheric distortion is not uniform across the whole image — one part of the Moon may be sharp while another is blurry at any given moment.
- Set Min Bright to around 30% to prevent APs from being placed on the dark sky background, where there is no detail to track. APs placed on dark areas will degrade your stack.
- Set AP Size to around 48px as a good starting point. Smaller APs capture finer detail but are more sensitive to noise; larger APs are more stable but less precise.
3) Stack
Before clicking 3) Stack, configure the Stack Options panel on the right:

- Frame percentage to stack: Start with 25% — this keeps only the sharpest quarter of your frames. If your seeing conditions were poor, you may need to increase this to 50% or more to have enough frames for a clean result. If seeing was excellent, dropping to 10–15% can yield exceptional detail.
- Output format: Select TIF for maximum bit depth and quality. Avoid JPEG at this stage as it is a lossy format and will discard fine detail.
- Blend RAW for 50%: Enabling this produces a second output file alongside your stack — an unsharpened version that is useful as a reference and can also be used in subsequent processing steps in applications like Siril or LuckyStackWorker.
- Super Resolution: Leave this off unless you are specifically experimenting with it. It upscales the image using sub-pixel information from the stack but can introduce artefacts if not used carefully.
Click 3) Stack to begin. AS!4 will align all selected frames using the AP grid and combine them into a single output image, saved to the same folder as your input file.
The resulting stacked TIF file is your starting point for the next stage of processing — sharpening and detail enhancement using wavelets in Siril or LuckyStackWorker.
LuckyStackWorker
LuckyStackWorker (LSW) is a free, open-source application developed by Nico Coesel, designed specifically for planetary and lunar image processing. It combines frame selection, alignment, and deconvolution sharpening into a single streamlined workflow. For lunar imaging it is particularly effective as a preprocessing step before loading the result into Siril — its deconvolution pass tightens fine surface detail in a way that complements rather than duplicates Siril’s wavelet sharpening.
LSW can be downloaded from github.com/wkasteleijn/luckystackworker.
The workflow in LSW focuses on two key steps: defining the Point Spread Function (PSF) and applying deconvolution sharpening.
1) Point Spread Function (PSF)
The PSF describes how a perfect point of light — such as a star — is blurred by your optical system and the atmosphere. By telling LSW the shape of this blur, it can mathematically reverse it, recovering detail that the blurring has obscured. This process is called deconvolution.
For lunar imaging, use a Synthetic PSF rather than trying to measure one from the image itself:
- PSF Type: set to Synthetic
- Airy disk radius: set to 10 — this corresponds to the theoretical diffraction limit of your aperture. For the SeeStar S30 Pro’s 30mm objective, 10 is a good starting value. Increasing this value widens the PSF and applies stronger deconvolution; decreasing it applies less.
- Diffraction intensity: set to 60 — this controls how strongly the Airy disk rings are weighted in the PSF model. Higher values account for more prominent diffraction rings; lower values produce a simpler, more Gaussian-shaped PSF.
- Seeing index: set to 4 — this adds an atmospheric blur component on top of the optical PSF. A value of 4 represents moderate seeing. Increase this on nights of poor seeing; decrease it when conditions were exceptional.
The PSF preview window will update in real time as you adjust these sliders, showing you the shape of the blur model being applied.

2) Deconvolve & Sharpen
Once the PSF is defined, switch to the Deconv. & Sharpen tab to configure the sharpening pass:
- Methods: enable Deconvolve — this is the primary sharpening method in LSW and uses the PSF defined above to reverse optical and atmospheric blur
- Suppress clipping: set to 0 — leave at zero unless highlights are blowing out
- Deconv. iterations: set to 10 — this controls how many times the deconvolution algorithm iterates. More iterations produce stronger sharpening but increase the risk of ringing artefacts around high-contrast edges. 10 is a safe starting point for lunar work.
- Blend raw: set to 10 — this blends a proportion of the original unsharpened image back into the result, which helps suppress ringing and keeps the output looking natural. Higher values produce a softer result; lower values produce a more aggressive deconvolution.
Edge Artefact Suppression reduces the ringing that deconvolution can introduce around sharp edges such as crater rims:
- Mode: set to Dering — this specifically targets the bright halos that can appear around high-contrast edges after deconvolution
- Strength: set to 10
- Radius: set to 3
Once all settings are configured, apply the processing and export the result as a TIFF file. This deconvolved output then feeds directly into Siril for wavelet sharpening and tonal processing.

Siril
Background Colour Calibration
The Moon’s surface contains real, measurable mineral colour — titanium-rich basaltic maria carry a subtle blue tone, while iron-rich highland regions trend warmer. These differences are small and easily destroyed. Siril’s full-image colour calibration treats them as a sensor bias to be corrected and removes them. Calibration must therefore be applied to the black sky background only, leaving the lunar surface untouched.
- Using the Rectangle Select tool, draw a selection over a patch of pure black sky — clear of the lunar disc and any star or lens artefact. A clean 100–150 pixel square is sufficient.
- Open Calibration → Color Calibration
- Under Background reference, click Use current selection
- Click Background Neutralization — Siril measures the R, G and B values within the sky sample and computes correction factors that bring all three channels to a neutral balance
- Click Apply
Wavelet Sharpening
Wavelets decompose the image into distinct layers of spatial detail — fine crater rims at one scale, broad maria boundaries at another — allowing each to be boosted independently. This is more precise than global sharpening, which amplifies noise and detail equally.
Navigate to Image Processing → Wavelets Control. Set Type to BSpline with 6 layers.
| Layer | Value | Scale | Lunar surface target | Reasoning |
|---|---|---|---|---|
| L1 | 1.20 | Finest | Smallest craterlets and sensor-level micro-detail | Conservative — avoids amplifying noise from the 30mm aperture |
| L2 | 1.60 | Fine | Crater rims, ejecta filaments, fine ray structure | Reduced from 1.80 — higher value produced an artificial over-etched look |
| L3 | 1.25 | Mid-fine | Surface texture, crater floor detail, smaller ray filaments | Settled at 1.25 — 1.20 was slightly soft, 1.30 pushed highland regions too far |
| L4 | 1.50 | Mid | Crater wall terraces, ridge contours, medium topographic features | Increased from 1.40 — adds genuine three-dimensionality to crater walls |
| L5 | 1.20 | Large | Maria shorelines, basin transitions, broad surface boundaries | Confirmed at 1.20 — 1.30 over-cooked the large-scale maria boundaries |
| L6 | 1.00 | Global | Largest-scale tonal features and overall disc shape | Left neutral — boosting here affects contrast, not surface detail |
Export from Siril
Export at full 16-bit depth to preserve all tonal data for GIMP processing.
- File → Export as TIFF — select 16-bit depth
- Suggested naming convention:
YYYY-MM-DD-siril-processed-v1.tif
GIMP
All colour and finishing work is performed in GIMP. Each step is applied as a new layer built from the visible composite — use Layer → New from Visible before each step. Do not use Duplicate Layer, which copies only the pixel data of a single layer rather than the merged result of all layers below.
The layer stack builds from bottom to top in the following order:
| Layer | Purpose |
|---|---|
| Base TIF | Siril output — starting point |
| curves and levels | Optional tonal refinement |
| sat 1, sat 2, sat 3 | Colour saturation rounds |
| Colour balance | Shadows/Midtones/Highlights correction |
| Colour defringe | Fringe channel desaturation |
| High pass | Sharpness recovery |
| colour balance curves | Final colour cast correction |
Curves and Levels
These are optional refinements. If tonal work was completed in Siril, this step can be skipped. It is included for workflows where Siril handles sharpening and colour calibration only, with tonal adjustment deferred to GIMP.
- Layer → New from Visible → rename to
curves - Colors → Curves — apply a gentle midtone S-curve across all channels to separate the dark basaltic maria from the brighter highland terrain
- Colors → Levels — set white point only if highlights are not reaching the right of the histogram
Colour Saturation
The Moon’s mineral colour is present in the raw data but at very low saturation. Multiple moderate passes produce a more natural result than a single aggressive boost and reduce the risk of oversaturation artefacts. Three rounds are standard for SeeStar S30 Pro data. A fourth can be added if colour remains weak, but additional rounds beyond that tend to introduce a blue cast.
- Layer → New from Visible → rename to
saturation 1 - Colors → Hue-Saturation → Scale: 1.25 → OK
- Repeat for
saturation 2andsaturation 3, each at 1.25
Colour Balance
Colour balance applies targeted corrections to shadows, midtones and highlights independently. Adjustments should be small — use the arrow keys to nudge values rather than dragging sliders. All three ranges are set within the one dialog session.
- Layer → New from Visible → rename to
colour balance - Colors → Color Balance
| Range | Cyan / Red | Magenta / Green | Yellow / Blue |
|---|---|---|---|
| Shadows | −3 (Cyan) | 0 | +3 (Blue) |
| Midtones | 0 | −3 (Green) | 0 |
| Highlights | +3 (Red) | 0 | −3 (Yellow) |
Click OK once, after all three ranges have been set.
Fringe Reduction
Colour fringing appears most prominently at the limb of the disc but can also present as unwanted cyan or magenta tinting across the surface. This step desaturates the specific channels responsible without affecting the overall colour balance. Adjust within the ranges given — over-desaturating these channels will pull colour from the mineral regions as well.
- Layer → New from Visible → rename to
colour defringe - Colors → Hue-Saturation
- Cyan channel: Saturation −40 to −50
- Magenta channel: Saturation −30
- Red channel: Saturation −30 to −40
- Click OK
High Pass Sharpening
The High Pass filter recovers fine surface detail and adds crispness across the image after the colour layers. It is applied once, on top of all preceding colour work.
- Layer → New from Visible → rename to
high pass - Filters → Blur → High Pass
- Std. Dev.: 4.0
- Mode: Overlay
- Opacity: 20–23%
- Tick Merge filter before clicking OK
Temperature Correction
A residual colour cast is common after saturation and fringe work and may not be apparent by eye. Rather than measuring and adjusting in separate steps, the GIMP histogram can be used to provide live feedback while corrections are applied.
Setting up the selection:
- Select the Select by Color tool
- Click on the black sky background — this selects the sky region
- Select → Invert — the selection now traces the actual lunar disc boundary
This approach is more accurate than an ellipse selection, which includes sky pixels at the edges and produces less reliable Mean values.
Measuring and correcting simultaneously:
- Open Windows → Dockable Dialogs → Histogram
- Layer → New from Visible → rename to
colour balance curves - Open Colors → Curves
- Switch the histogram channel selector between Red, Green and Blue to read the Mean value for each channel
- Switch to the offending channel in the Curves dialog and nudge the midpoint up or down — the histogram Mean values update live as adjustments are made
| Reading | Interpretation |
|---|---|
| Blue Mean > Red Mean by > 0.015 | Significant blue cast — pull Blue curve down or Red up |
| Blue Mean > Red Mean by 0.005–0.015 | Mild blue cast — gentle correction |
| R ≈ G ≈ B within 0.005 | Neutral — no correction required |
| Red Mean > Blue Mean | Warm cast — pull Red curve down or Blue up |
- Click OK once all three channel Means are within 0.005–0.010 of each other
- Select → None
Note on fringing: applying a curves correction with a selection active creates a hard boundary at the disc edge where transitional pixels receive a proportionally reduced correction. This is below visible threshold in practice, but feathering the selection by 2–3 pixels (Select → Feather) before applying curves will eliminate any theoretical risk at the limb.
Export
Save the full layer stack as an XCF master file before exporting.
- File → Save As →
.xcf— preserves all layers for future refinement - File → Export As → JPG at 95% quality — GIMP composites all visible layers automatically on export; flattening is not required
- Suggested naming:
YYYY-MM-DD-moon-final-v1.jpg